

Key Takeaways
Buying cheap Honda Civic parts Sunshine Coast – cash & carry can work well when you identify the exact part and inspect it carefully.
- Match the part to the Civic’s year, generation, engine, trim, and body style.
- Compare used, reconditioned, aftermarket, and OEM options before paying.
- Inspect used parts for damage, corrosion, leaks, wear, and missing hardware.
- Include removal, transport, installation, deposits, and warranty terms in the real cost.
- Call suppliers ahead and bring the VIN, part number, and detailed vehicle information.
What to know before buying Honda Civic parts on the Sunshine Coast
Cash-and-carry buying can lower a repair bill, but the saving depends on choosing a sound, compatible part. Local availability may change quickly, so a little preparation is usually more valuable than rushing toward the lowest sticker price. It also helps to know whether you need a cosmetic panel, a service component, or a part tied to safety or drivability.
Why cash-and-carry parts can reduce repair costs
Cash-and-carry purchases may reduce costs because you are buying a part directly rather than paying for a supplier to remove, deliver, or install it. Some yards also allow buyers to inspect the item before completing the transaction. That can make sense for an older Civic where a replacement door, mirror, wheel, or trim piece does not need to be new. The saving is only real, however, if the part fits and does not require expensive rework.
Ask what is included before comparing prices. A loose component may look inexpensive until you discover that brackets, bulbs, sensors, fasteners, or related wiring are sold separately. The cheapest upfront price is not always the cheapest repair once those omissions are counted.
Common Civic parts available from auto recyclers
Auto recyclers commonly handle parts recovered from vehicles being dismantled, although exact stock varies by location and by the vehicles recently received. You may find body panels, bumpers, lights, mirrors, wheels, interior trim, seats, switches, suspension pieces, cooling components, and selected engine or transmission parts. Matching colour and condition can be particularly useful when replacing exterior pieces.
Before travelling, describe the part rather than relying only on a casual name. “Front right headlight assembly” is more useful than “headlight,” especially when a Civic generation has different lamp shapes or mounting points. Ask whether the item is complete and whether it was removed from a running or damaged vehicle.
Used, reconditioned, aftermarket, and OEM options
Used parts are generally recovered from another vehicle, while reconditioned components have been inspected or rebuilt to some degree. Aftermarket parts are made by a supplier other than the original vehicle manufacturer, and OEM parts are made for the vehicle’s original equipment specification. These labels do not automatically tell you the condition, exact compatibility, or remaining service life.
Use the part’s role to guide the choice. A clean used trim panel may be sensible, while a critical mechanical or safety-related component deserves closer testing and clearer warranty terms. New replacements can also be worth considering when labour is high or when failure would create a much larger expense.
When buying cheap parts may not be the best choice
A low-cost part may be a poor bargain if it has hidden damage, an uncertain history, or a difficult installation. Parts connected with braking, steering, airbags, restraint systems, fuel delivery, or structural integrity deserve particular caution. The same applies to an engine or transmission when removal and refitting will cost more than the part itself.
Consider reliability, downtime, and the consequences of another failure. A slightly more expensive component with a clear return arrangement may be safer for your budget than an untested item that cannot be returned. If you cannot verify fitment or condition, pause before handing over cash.
How to identify the correct Honda Civic part
Civic parts can look nearly identical while differing in connectors, mounting points, dimensions, or software requirements. The model name alone is rarely enough for an accurate match. Gather the vehicle details first, then compare the replacement against the original part and the supplier’s information.
Matching the Civic’s model year and generation
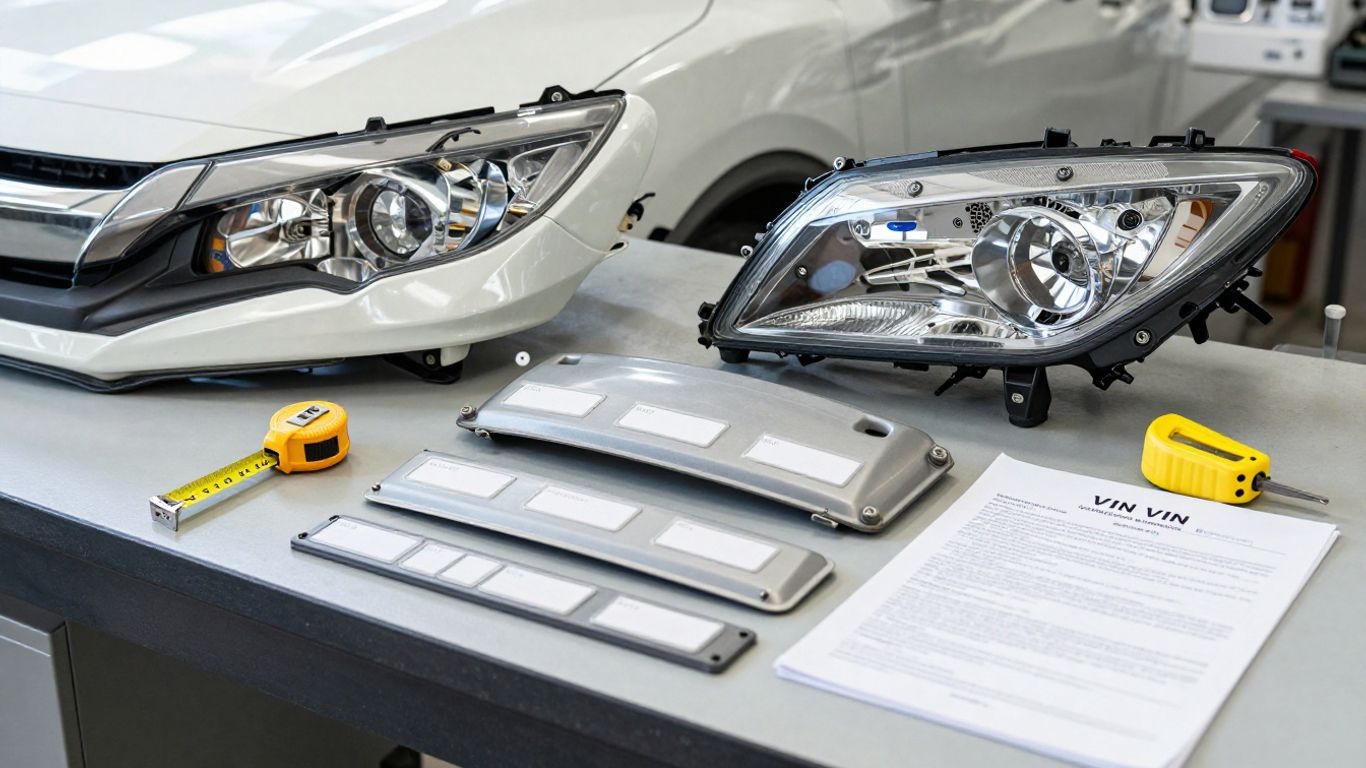
Start with the model year, but do not stop there. A model-year change may bring revised bumpers, lamps, dashboards, suspension components, or electrical connections, and a vehicle built near a changeover may need extra checking. Registration details can help, but the physical part and vehicle identification information are stronger references.
Take a photograph of the existing component and note its mounting points. If possible, compare the replacement beside the old part before purchase. This simple step can reveal differences that are hard to see in an online listing.
Checking the engine, transmission, and body style
Engine type, transmission, sedan or hatchback body style, and trim level can all affect fitment. A component designed for one engine bay may have different hoses, brackets, sensors, or clearances in another version. Exterior parts can vary by body shape, facelift, equipment level, and market specification.
Tell the supplier every relevant detail instead of assuming the Civic badge is enough. If you are buying a mechanical component, record the engine code or transmission information where available. For body parts, provide the number of doors, body style, colour code, and whether the vehicle has features such as parking sensors or fog lamps.
Using the VIN, part number, and vehicle trim
The VIN is a useful starting point because it identifies the individual vehicle. A stamped, moulded, or printed part number can narrow the search further, although numbers may be difficult to read after years of heat, dirt, or repairs. Trim information can also explain differences in seats, switches, lighting, audio equipment, and interior panels.
Share clear photographs of labels and connectors when calling or messaging a supplier. Do not assume that a similar-looking number is interchangeable. Confirm the number, vehicle application, and condition together, and ask whether the supplier has checked the part against your details.
Confirming left-hand and right-hand fitment
Side-specific parts are an easy source of mistakes. Mirrors, doors, guards, lights, suspension components, and some interior pieces may be different on the left and right sides. “Driver side” can also cause confusion when vehicles and suppliers use different regional conventions, so use left or right as viewed from inside the car facing forward.
Compare the mounting tabs, plug position, shape, and part number with the original. If the replacement is being collected, bring the old component or detailed photographs whenever practical. Confirming side and orientation before payment is much easier than arranging a second trip.
Where to find cheap Honda Civic parts locally
The Sunshine Coast offers several practical ways to search for replacement parts, from dismantlers and recyclers to repair businesses and online listings. Each source has a different balance of price, convenience, selection, and advice. A local pickup can save delivery time, but only if the part is confirmed before you travel.
Honda wreckers and auto recyclers
Wreckers and auto recyclers can be useful for used panels, interior pieces, lights, wheels, and mechanical components. Their stock depends on the vehicles available for dismantling, so one call may save a wasted drive. Give them the exact vehicle details and ask whether the part is already removed or still attached.
Ask about condition, completeness, and testing. A part that is ready for collection may be more convenient than one requiring removal, while a self-service option may cost less if you have the tools and experience. Clarify both arrangements before arriving.
Cash-and-carry parts yards on the Sunshine Coast
A cash-and-carry yard may suit buyers who want to examine a part in person and take it away immediately. This is especially helpful for visible items where colour, shape, scratches, and mounting points matter. Bring gloves, a tape measure, a torch, and photographs of the original component.
Yard rules vary, so ask whether customers remove parts themselves, what tools are permitted, and whether staff can help with heavy items. Keep small fasteners and brackets with the component where possible. Missing hardware can turn a good-looking purchase into a frustrating installation.
Local repair shops and specialist suppliers
Repair shops and specialist suppliers may help identify a part when the fault is unclear or when several related components could be involved. They may also know which items are commonly replaced together. Their advice can be valuable even if you ultimately purchase a used part elsewhere.
Be clear about whether you want diagnosis, supply, installation, or only a part number. That avoids confusion about the quote and makes it easier to compare like with like. For complicated electrical or mechanical work, paying for accurate diagnosis can prevent an unnecessary purchase.
Online listings with local pickup options
Online listings can broaden the search and make price comparison easier, but photographs and descriptions may omit important details. Check the seller’s location, pickup hours, return conditions, and whether the listed price is for a complete assembly or only one component. Ask for current photographs if the listing appears old.
Keep messages specific and written. State the Civic year, generation, engine, body style, side, and part number where available. A written confirmation of compatibility is not a guarantee, but it creates a clearer record of what was discussed.
How to inspect used Honda Civic parts before purchase
Inspection is the point where a low price either becomes a useful saving or a costly mistake. Look at the part in good light and compare it with the original before paying. For larger components, arrange help and allow enough time to check more than the most visible surface.
Checking body panels, lights, and exterior trim
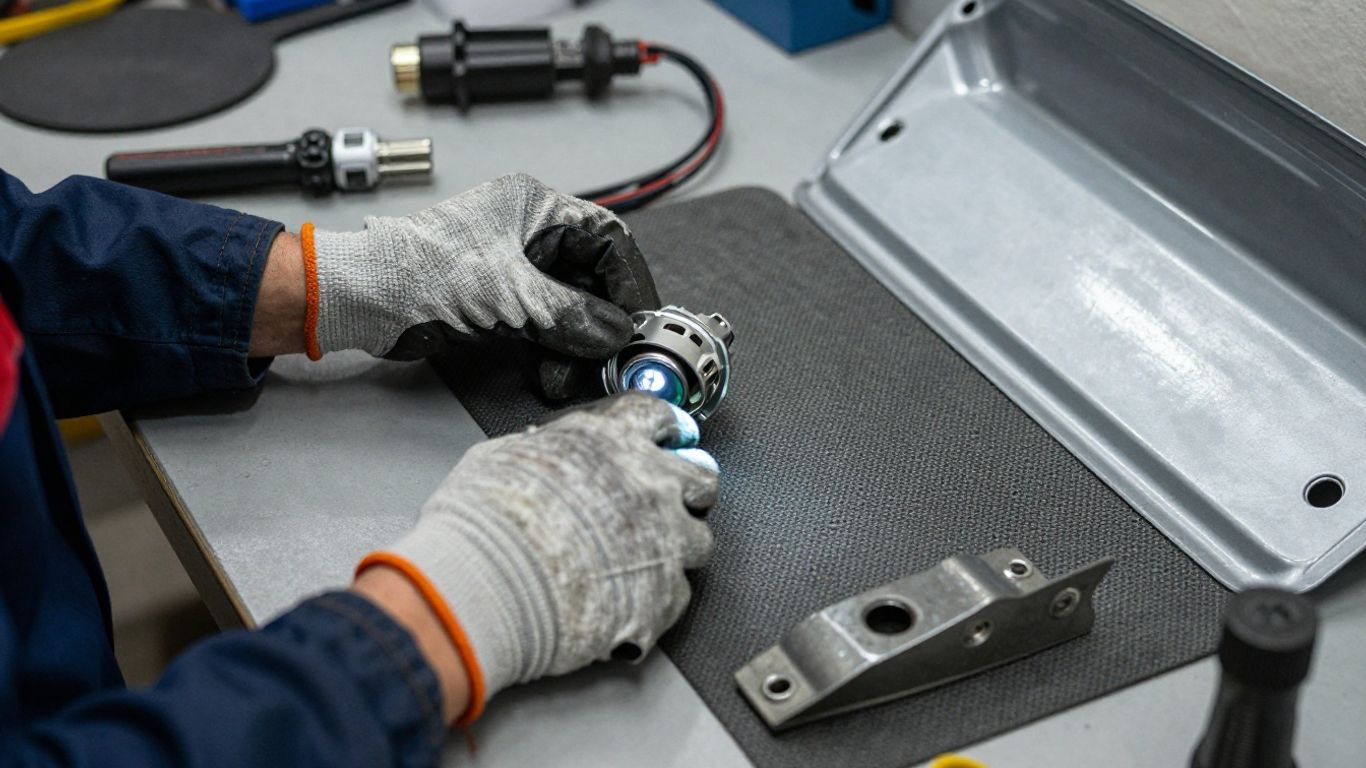
Check body panels for dents, ripples, bent edges, mismatched seams, and signs of previous repair. Inspect mounting tabs and clips because a panel can appear sound while having broken attachment points. For lights, examine the lens, housing, adjusters, seals, plug, and any signs of moisture inside.
Colour matching is useful but not guaranteed after years of sun exposure. Compare the finish from several angles and ask whether the panel has been repainted. Exterior trim should be checked for warped sections, missing clips, brittle plastic, and cracks around screw holes.
Evaluating engines, transmissions, and mechanical components
Major mechanical parts require more than a quick visual check. Look for oil or coolant residue, damaged connectors, broken brackets, seized pulleys, cracked housings, and evidence of impact. Ask where the component came from, whether its mileage is known, and what testing was performed.
For an engine or transmission, confirm the identification marks and included accessories. A bare assembly may not include sensors, manifolds, mounts, wiring, or control units that your installation needs. If the supplier cannot explain what is included, price the missing pieces before deciding.
Testing electrical parts and interior accessories
Electrical components should be checked for broken plugs, bent pins, frayed wiring, water damage, and overheated areas. Switches, motors, window regulators, instrument panels, audio units, and control modules can look clean while still failing under load. Ask whether testing is possible before purchase.
Match connectors and mounting points with the original and photograph both sides. Some electrical parts may also need programming, coding, or vehicle-specific configuration after installation. Confirm that requirement in advance rather than assuming a direct plug-in replacement.
Looking for corrosion, cracks, leaks, and excessive wear
Pay close attention to areas that are hidden once the part is installed. Corrosion around seams, cracks in plastic housings, worn splines, leaking seals, and stretched mounts can shorten the useful life of a replacement. Dirt alone is not proof of failure, but fresh residue or a strong fluid smell deserves questions.
Use a torch and inspect from several angles. For rubber components, look for hardening, splitting, and deformation. For metal components, distinguish ordinary surface staining from deep corrosion or distortion. If you cannot judge the condition confidently, ask a mechanic to inspect it before purchase.
How to compare prices and protect your budget
Price comparison works best when each option includes the same level of completeness and support. A cash-and-carry figure may exclude removal, transport, installation, or a deposit, while a new replacement may include a clearer warranty. Write down the full cost rather than relying on memory or a headline price.
Comparing cash-and-carry prices with new replacements
Compare the used part with a new replacement of the same type and specification. Include shipping, taxes or fees where applicable, and any clips, seals, fluids, or ancillary items needed for installation. For a cheap cosmetic part, a used option may be an obvious fit; for a labour-intensive component, the calculation can be different.
A simple comparison table can keep the decision grounded. The figures below are categories to consider, not fixed prices.
| Cost factor | Used cash-and-carry | New replacement | Reconditioned option |
|---|---|---|---|
| Part price | Often lower | Often higher | Varies by component |
| Condition | Must be inspected | Usually unused | Depends on process |
| Warranty | May be limited | Check supplier terms | Confirm coverage |
| Installation risk | Fitment must be verified | Compatibility still matters | Ask what was replaced |
After filling in the actual amounts, consider the likely service life and the cost of another installation. The best value is the option that meets the repair need at a sensible total cost.
Factoring in deposits, warranties, and return policies
Ask whether the supplier requires a core deposit, refundable exchange deposit, or payment before removal. Clarify the time allowed for returns, whether the part must remain uninstalled, and who pays return transport. Warranty language may cover only the component and not labour, fluids, towing, or related damage.
Keep the receipt and any written terms. If a part is sold as untested, damaged, or final sale, treat that status as part of the price decision. A cheaper item with no practical remedy may carry more financial risk than a slightly dearer tested component.
Estimating removal, installation, and transport costs
Removal and installation can exceed the part price, particularly for engines, transmissions, suspension assemblies, and parts buried behind dashboards or trim. Ask a mechanic for an estimated labour time before buying. Include new seals, fluids, fasteners, calibration, alignment, and disposal where relevant.
Transport also matters. Protect glass, painted panels, electronics, and delicate trim from movement and weather. For a bulky component, compare the cost of borrowing a suitable vehicle with arranging delivery. The correct part is not a bargain if getting it home causes damage.
Recognizing unusually cheap or incompatible parts
An unusually low price may reflect missing accessories, unknown mileage, damage, poor storage, or an incorrect listing. It can also indicate that the seller has described a related part rather than the exact component you need. Ask direct questions and compare photographs, numbers, connectors, and dimensions.
A low price is useful only when the part remains suitable, complete, and safe to install.
Apply that rule before treating a discount as a saving. If the answer to a basic compatibility or condition question is unclear, keep searching rather than allowing urgency to make the decision.
How to collect and install your Civic parts safely
Collection is not finished when the part is paid for. Plan how it will be lifted, protected, secured, and checked when you get home. Installation should match your tools, experience, and the consequences of getting the job wrong.
Preparing tools and measurements before pickup
Bring the tools needed for inspection and, if permitted, removal. A tape measure, torch, gloves, clean rags, phone camera, and small bags for fasteners are useful for many parts. Record dimensions and connector locations before leaving so you can compare them at the yard.
For self-removal, confirm the yard’s rules and allow more time than expected. Do not rely on a single tool if corroded fasteners or awkward access are likely. If the part is heavy, arrange a second person and a safe lifting method.
Transporting bulky or fragile parts
Support large panels across broad, padded surfaces and keep them from rubbing against tools or other cargo. Glass, lamps, painted panels, dashboards, and trim need protection from pressure and sudden movement. Secure the load without placing straps directly across fragile lenses or thin plastic.
Keep fluids contained and follow any supplier or transport requirements for components that may retain oil, coolant, or fuel. Once home, store the part somewhere dry and stable. A careful pickup protects the value you just paid for.
Deciding what to install yourself
Simple cosmetic replacements may be manageable for a confident owner with the correct tools and instructions. Even then, use proper support, disconnect power where appropriate, and keep track of fasteners. Do not improvise with damaged jacks, unsuitable stands, or makeshift lifting equipment.
Before starting, read the repair procedure and check whether the replacement needs adjustment, calibration, coding, bleeding, or alignment. If the job involves a safety system or a component you cannot test afterward, it is better to arrange professional help.
Knowing when to use a qualified mechanic
A qualified mechanic is the safer choice for work involving brakes, steering, suspension geometry, airbags, fuel systems, high-current electrical circuits, engines, transmissions, or structural areas. Professional installation can also protect a warranty when the supplier requires documented fitting or testing.
Tell the mechanic that the component is used and provide the receipt, part number, and any supplier notes. Ask them to inspect the replacement before installation. That may expose a compatibility issue while returning or exchanging it is still possible.
How to get better results from Sunshine Coast parts suppliers
Good supplier conversations are specific, concise, and easy to verify. Instead of asking whether someone has “a Civic part,” explain exactly what the vehicle is and what the component does. This improves the chance of a useful answer and reduces unnecessary travel.
Calling ahead with detailed vehicle information
Have the VIN, model year, generation, engine, transmission, body style, trim, and side of the vehicle ready. Add the original part number and photographs of the component, label, connector, and mounting points. Mention whether you need a complete assembly or a small subcomponent.
Ask the supplier to confirm current stock and collection arrangements. Stock can change between a phone call and arrival, so request that the part be held if the business offers that service. Repeat the key details before ending the call.
Asking about stock, condition, and compatibility
Useful questions cover more than availability. Ask whether the part is tested, damaged, complete, removed, cleaned, and stored indoors or outdoors. For mechanical items, ask about known mileage or source vehicle information; for body parts, ask about colour, repairs, and broken mounts.
Request the exact return and warranty terms before paying. If the supplier cannot verify fitment, treat the purchase as uncertain and compare the part physically with your original. Clear questions help both sides avoid a mismatch.
Negotiating multi-part purchases
If you need several related parts, ask whether the supplier can price them together. A package may be convenient when it includes matching brackets, wiring, clips, or trim, but do not accept unwanted pieces simply because the combined figure sounds lower. List each component and its condition.
Keep the negotiation practical and respectful. You can point out missing hardware, cosmetic damage, transport costs, or the need for testing when discussing the price. Confirm the final amount and what is included in writing before collection.
Keeping records for future repairs and maintenance
Save receipts, part numbers, photographs, supplier details, warranty terms, and installation dates. Note the donor vehicle information and any mileage supplied for major components. These records make future troubleshooting easier and help you avoid buying the same incompatible part again.
A simple parts folder on your phone can be enough. Add a photograph of the installed component and record any follow-up work, such as alignment, fluid replacement, or electrical programming. Over time, that history becomes a useful maintenance reference.
Conclusion
Buying cheap Honda Civic parts Sunshine Coast – cash & carry can be a sensible way to control repair costs when the part is correctly identified, carefully inspected, and priced as part of the complete job. Take the VIN and part details seriously, ask clear questions, and include transport and installation in your calculation. A careful purchase may take a little longer, but it is far more likely to deliver a useful saving.